How to Color Cells in Airtable? Smart Workarounds
In spreadsheet applications like Excel and Google Sheets, color formatting cells isn't just about making things look nice. It's a powerful way to present and interpret data more effectively.
Using different colors helps highlight important details, categorize information, and make patterns or trends stand out. It makes your data easier to read and lets you spot key insights at a glance.
Think about a project management spreadsheet: tasks that are overdue can be marked in red, upcoming deadlines in yellow, and completed tasks in green.
In a financial report, profits might be highlighted in green and losses in red, making it easy to see how things are going without digging through the numbers.
Airtable, however, doesn't allow you to color individual cells the way traditional spreadsheets do.
But that doesn't mean you can't make your data visually clear. There are two ways to go about it.
The quickest option is the Cell Coloring Chrome extension. It works exactly like Excel highlighting, so if you're coming from a spreadsheet background, it'll feel immediately familiar.
Once installed, you can select any cell or row and apply any color you want. No formulas to write, no extra fields to create, and no conditions to set up. Just click and color, exactly the way you'd expect.
Or if you'd rather use Airtable's built-in features, here are some free workarounds:
1. Use Single-Select Fields
One of the easiest ways to add color to your Airtable cells is by using single-select fields. These fields let you create predefined labels, each with its own color, making it easy to categorize and identify cells at a glance.
For example, if you're tracking task statuses, you can create a single-select field with options like "Completed" (green), "In Progress" (yellow), and "Overdue" (red).
Similarly, for priority levels, you can assign red to "High," orange to "Medium," and blue to "Low."
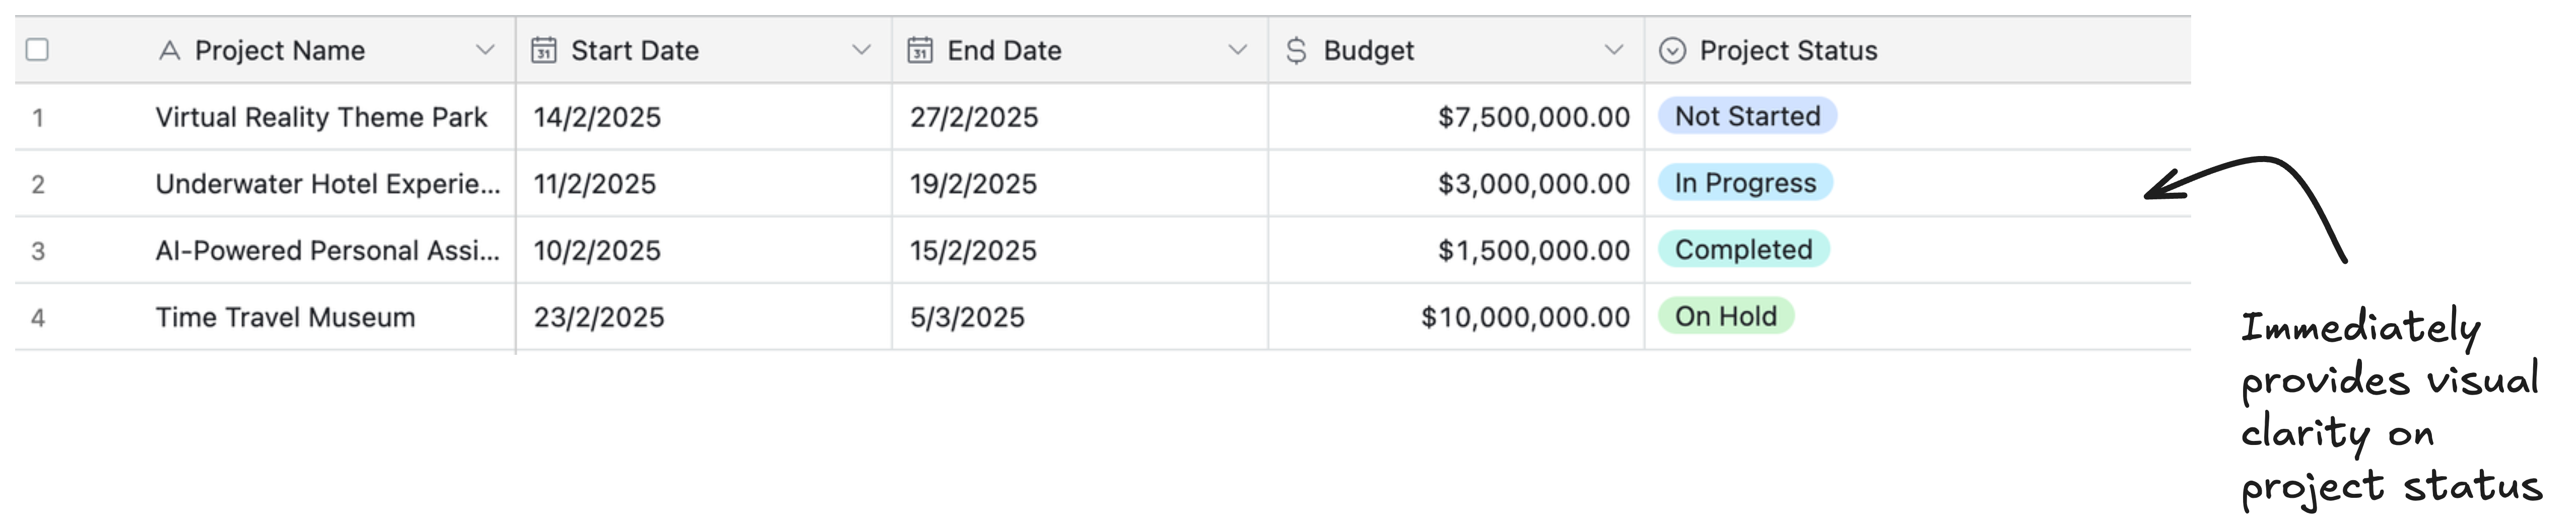
This simple approach provides immediate visual clarity, making it easier to scan through your records and quickly find what you need.
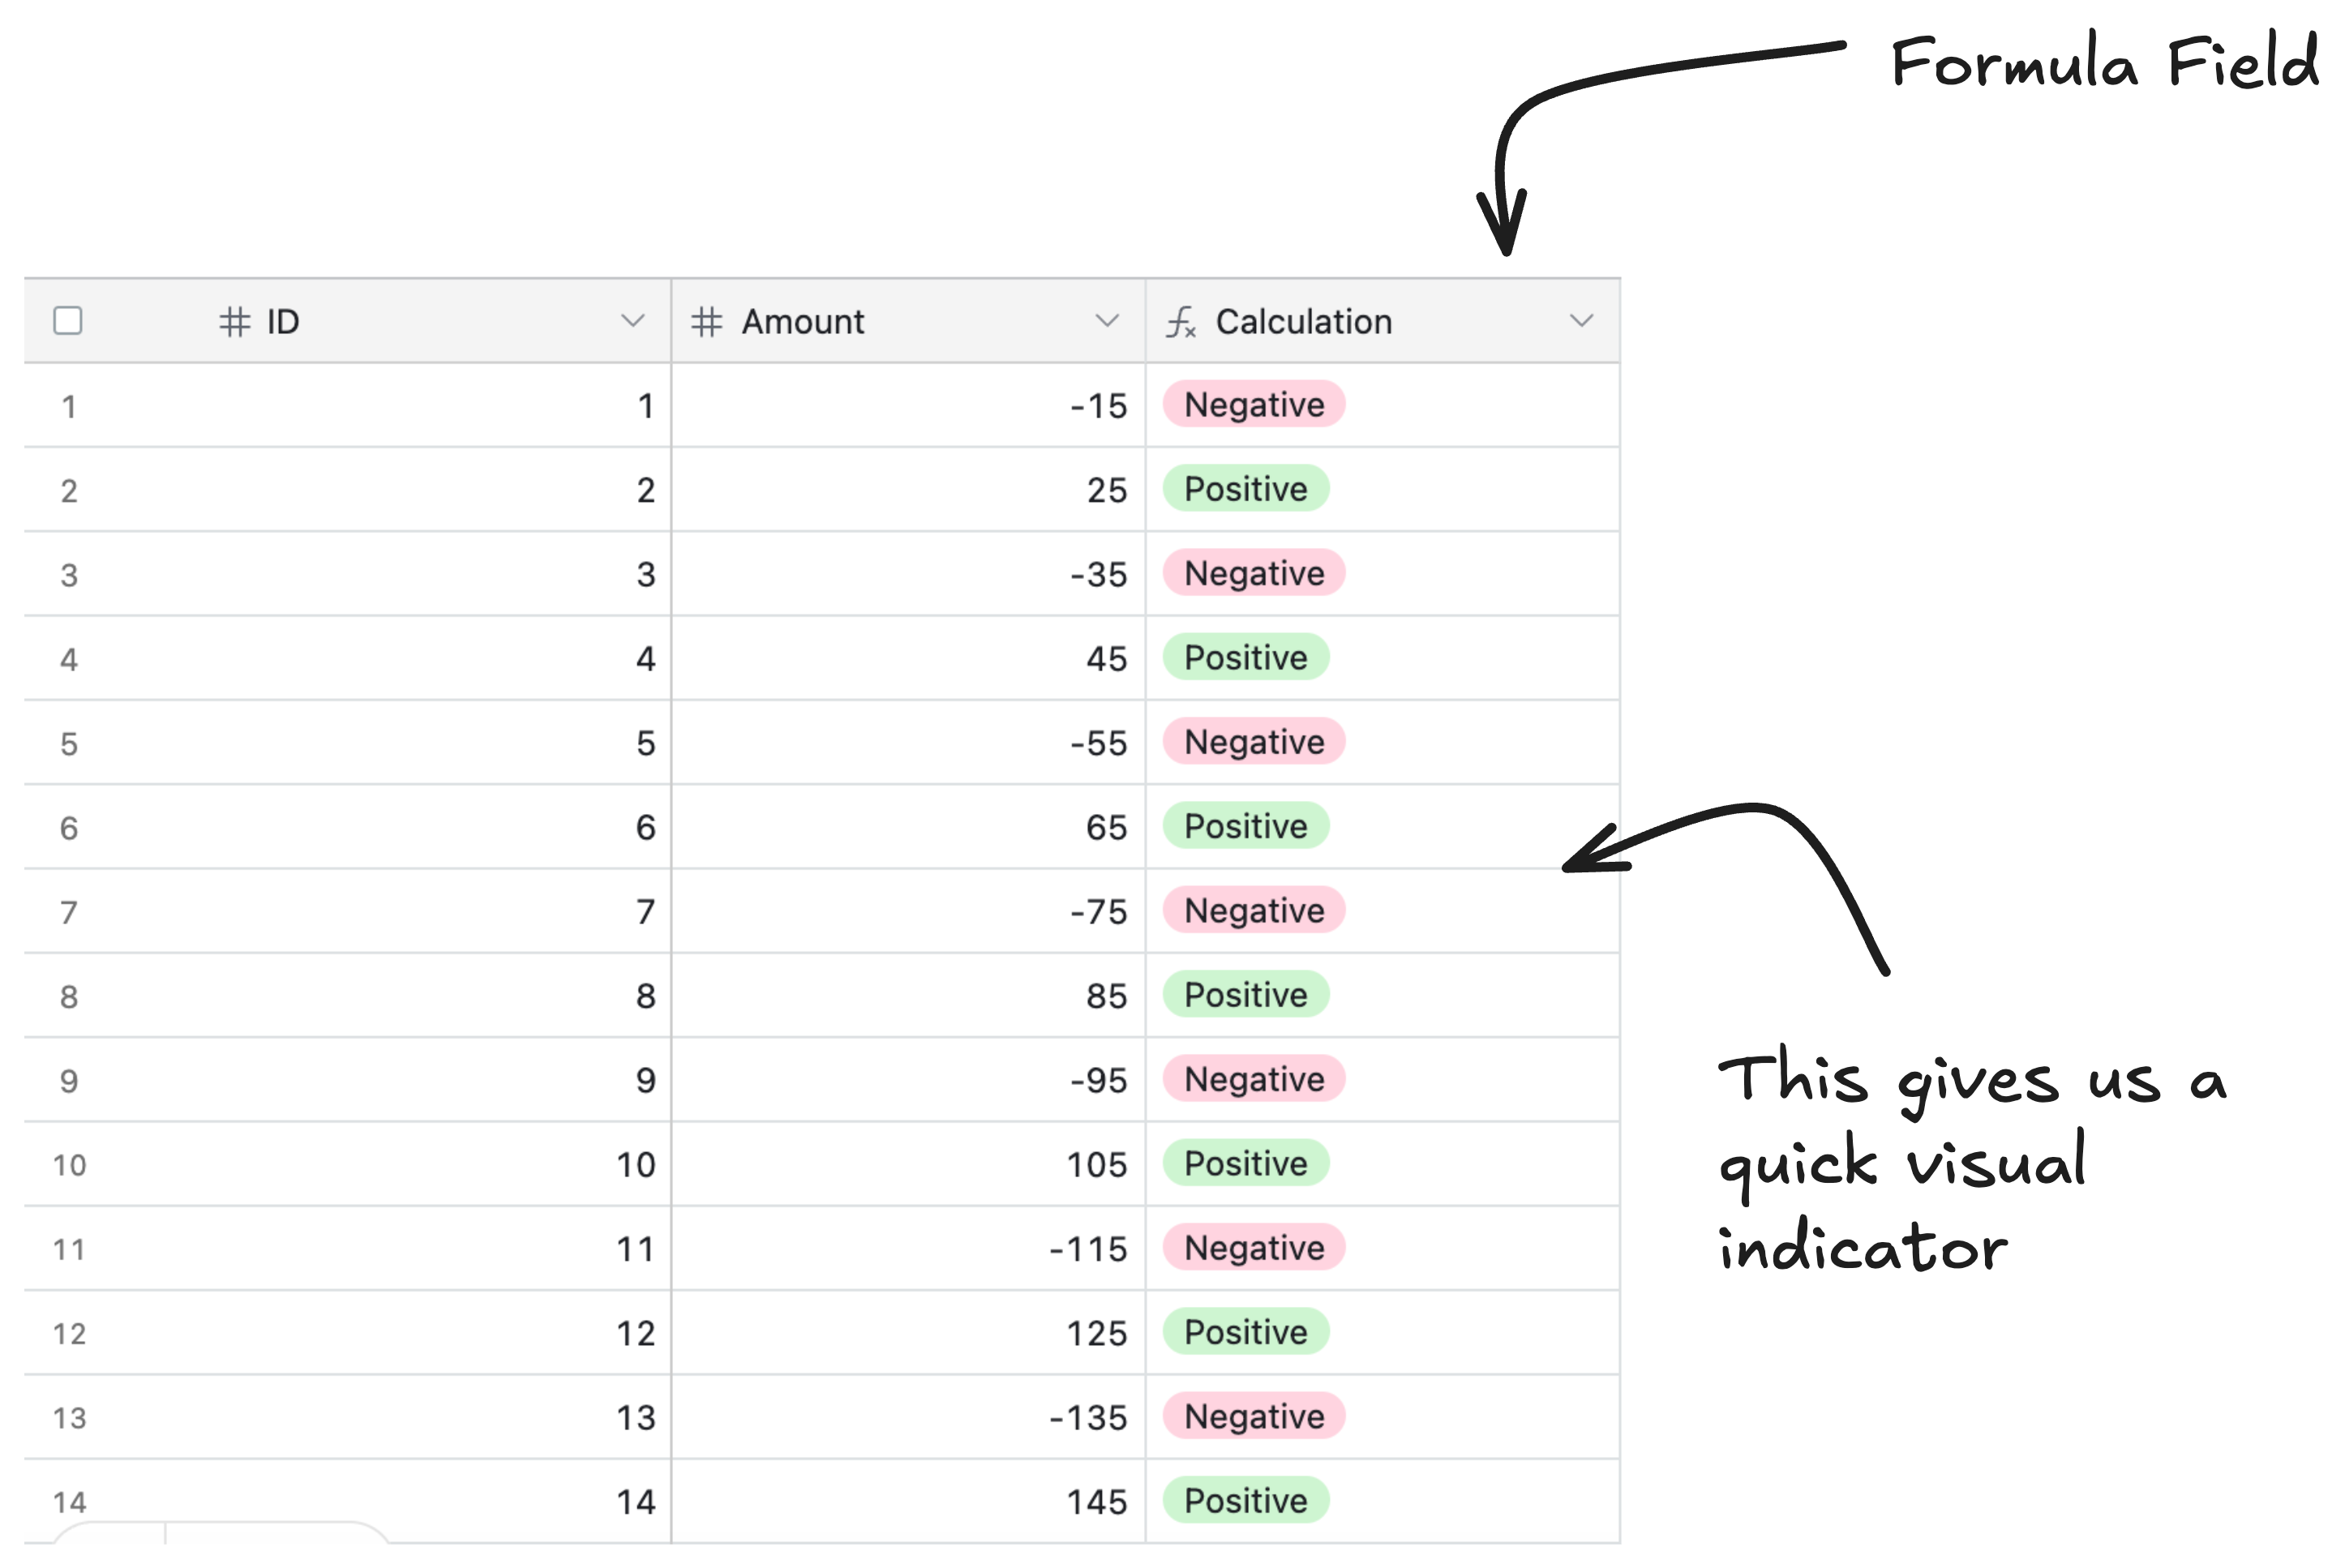
2. Use Formula Fields For Color-Coding
When dealing with a large set of values, single-select fields aren't practical. For example, if you're working with thousands of numbers like financial data, you can't manually label each one. That's where formula fields can help.
With a formula, you can automatically categorize values based on conditions.
For example, if you want to highlight positive numbers in green and negative numbers in red, you can create a formula field that classifies them as "Positive" for numbers greater than zero or "Negative" for numbers less than zero
Then, by assigning colors to these labels, you get a quick visual indicator. However, this method requires a separate column.
If you're unsure how to set up single-select fields using formulas, you can check out this article for more details.
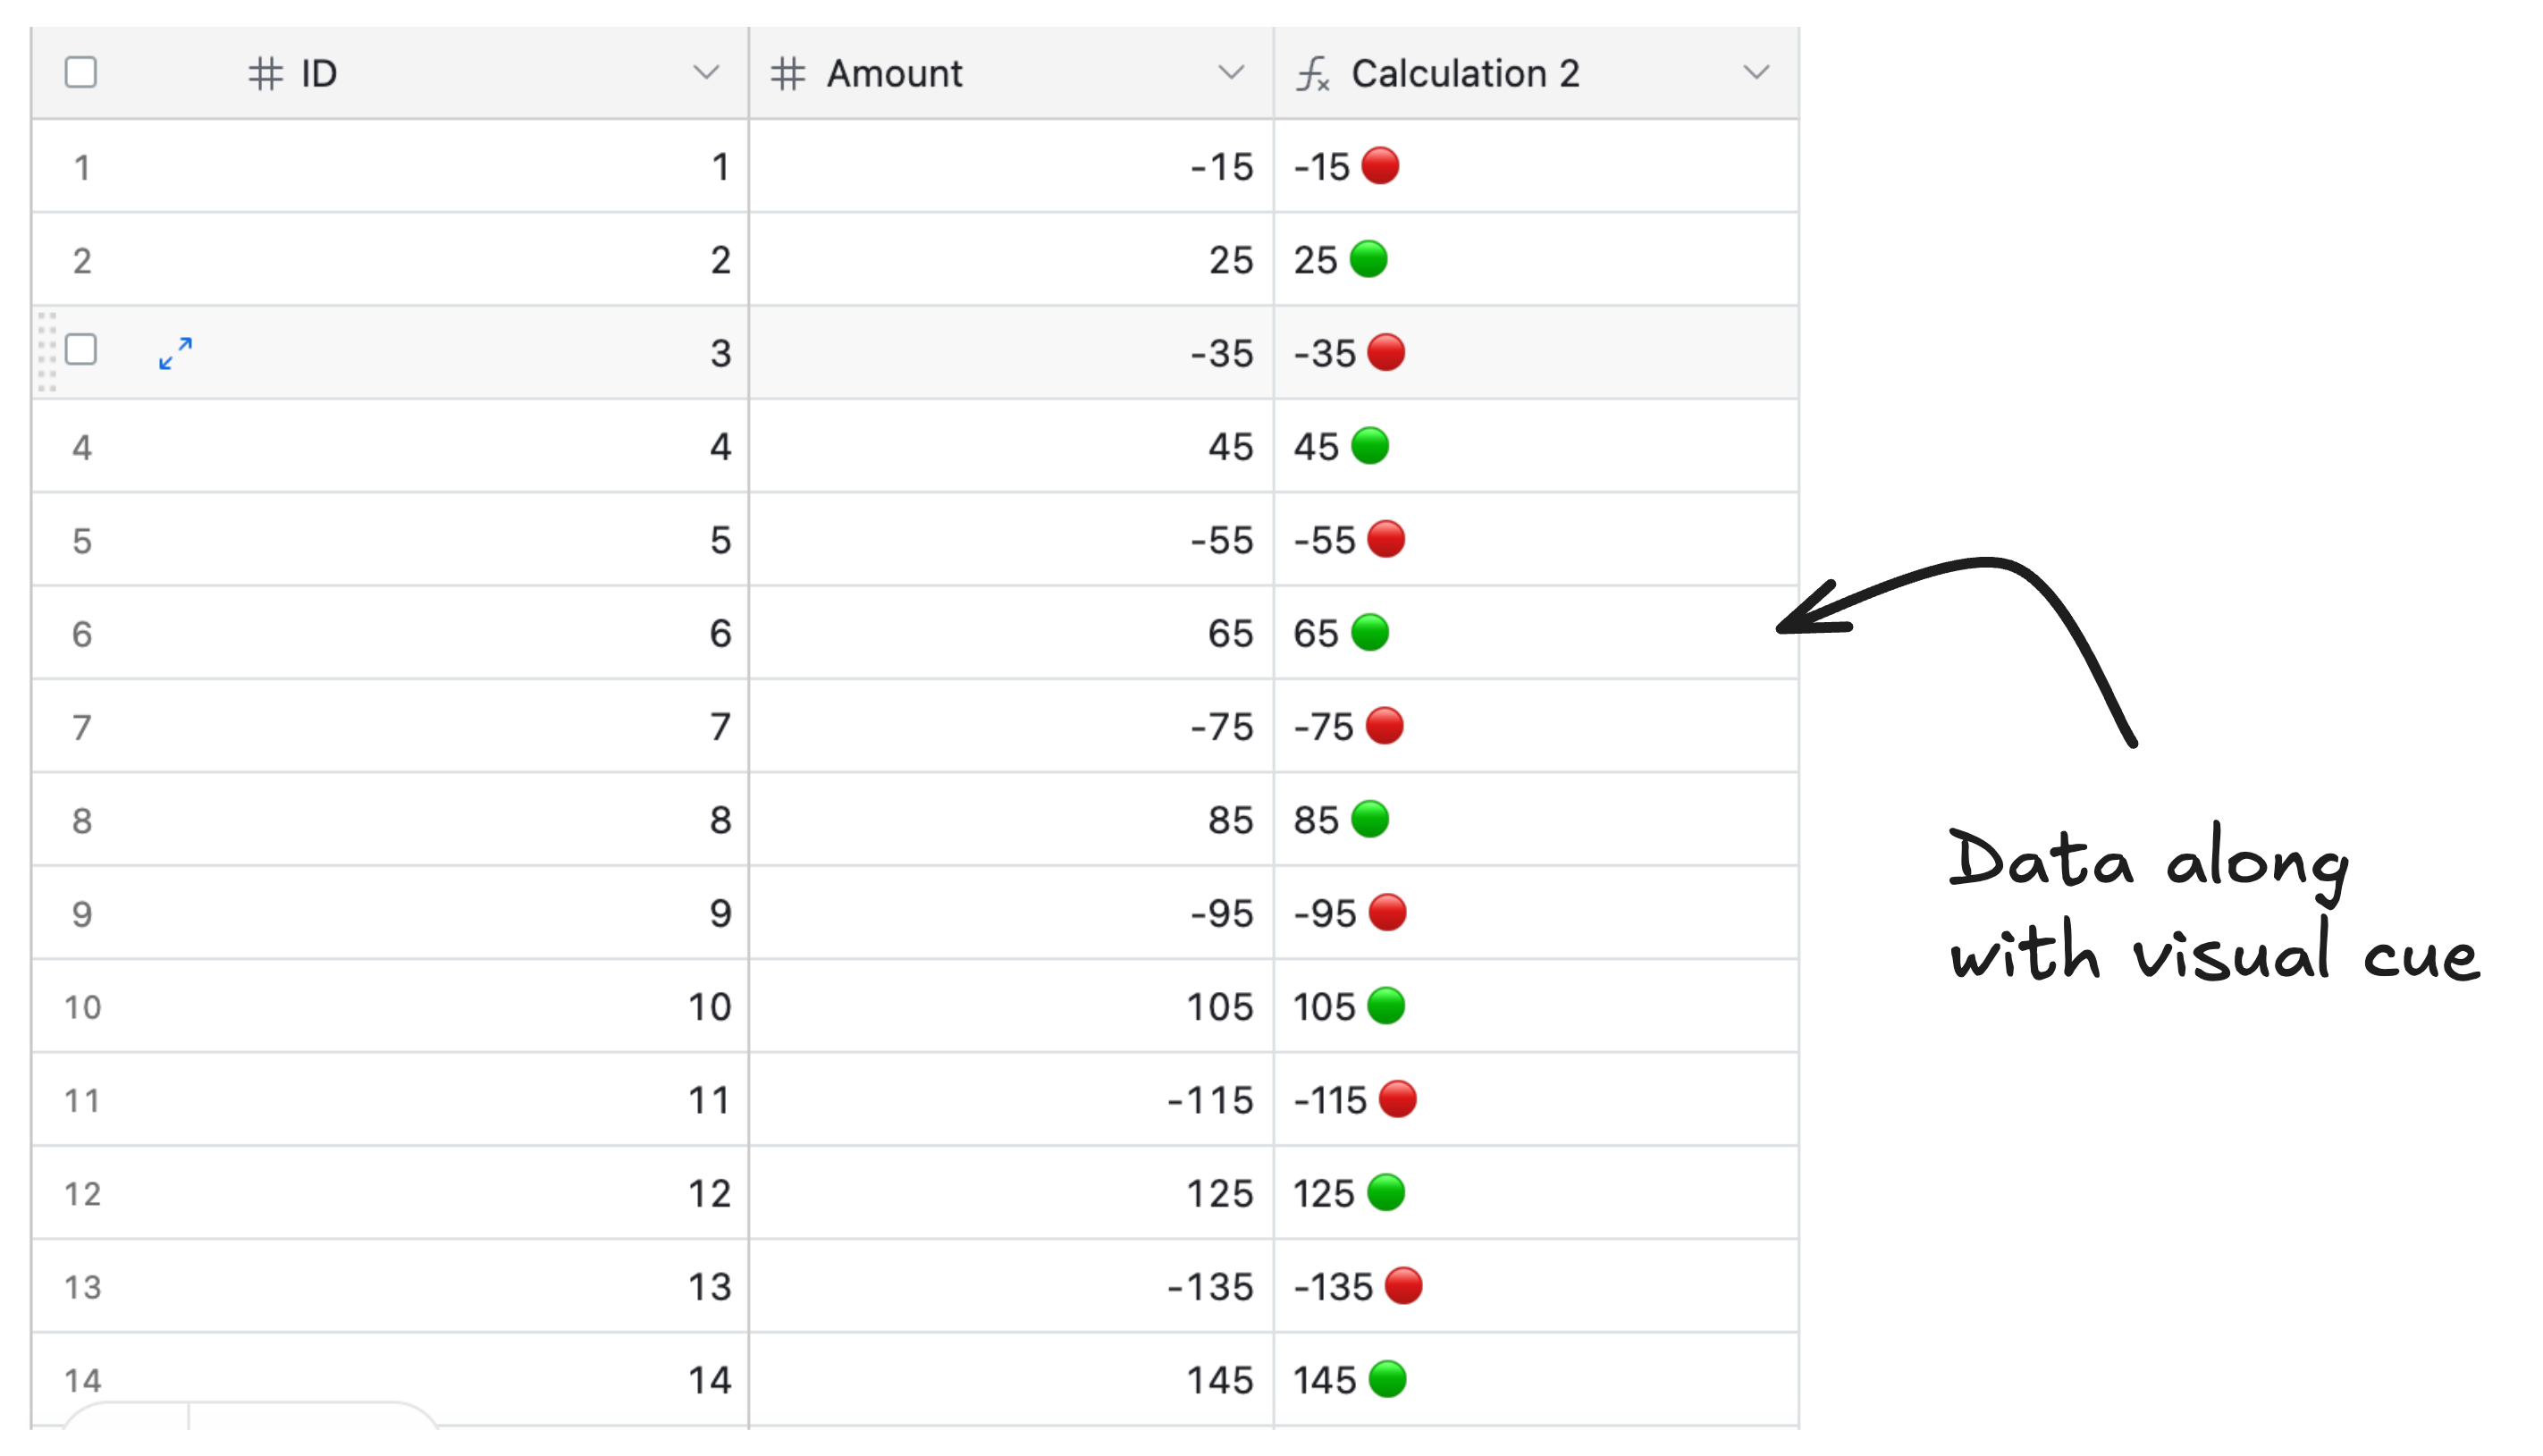
If you don’t want a separate column and prefer to keep both the color and data in the same cell, a better approach is to use emojis.
For example, if a value is greater than 0, the formula can add a green circle emoji (🟢) next to it. If the value is 0 or negative, it can display a red circle emoji (🔴) next to the value.
3. Highlight Records (Color Entire Rows)
Airtable does offer record coloring, which lets you apply colors to entire records based on specific conditions.
To set it up, open your grid view, click the Color option in the toolbar, and choose "Color records." From there, you can define a condition, like coloring every record red when a "Status" field equals "Overdue," or green when "Complete" is checked.

One thing worth knowing before you try this: record coloring is only available on paid plans. If you're on the free plan, you won't see this option.
It's also worth setting the right expectation about how it looks. Unlike Excel, where the entire row background changes color, Airtable only adds a thin colored vertical line on the left side of the record.
4. Color Cells Based on Dates
Dates are one of the most common reasons people want color coding in Airtable. Overdue tasks in red, upcoming deadlines in yellow, completed items in green. The good news is you can set this up using the same formula field approach from section 2.
Create a formula field that evaluates your date and outputs a label. For example:
IF(IS_BEFORE({Due Date}, TODAY()), "Overdue", IF(IS_BEFORE({Due Date}, DATEADD(TODAY(), 7, 'days')), "Due Soon", "On Track"))
This outputs one of three labels depending on where the date falls. Then create a single-select field that matches those labels and assign a color to each one. Red for Overdue, yellow for Due Soon, green for On Track.
Since the formula evaluates against today's date every time the base loads, the labels update automatically as time passes. No manual changes needed.
5. Color Column Headers
Airtable doesn't natively support changing the color of field (column) headers in the grid view. They're always the same gray, and there's no built-in setting to change that.
The only real workaround is to add a colored emoji at the start of the field name, like 🔴 Blocked or 🟢 Approved.
It's not true color coding, but it gives headers a visual identity that makes them easier to spot when you're scanning across a wide table.
6. Color Cells in Airtable Charts and Graphs
Airtable's charts are only available through the Chart extension in the Extensions panel. There's no native charting built into the grid view itself.
How you change colors depends on the chart type. For bar and line charts, the extension shows color options directly at the bottom of the configuration panel, so you can adjust them without touching any fields.
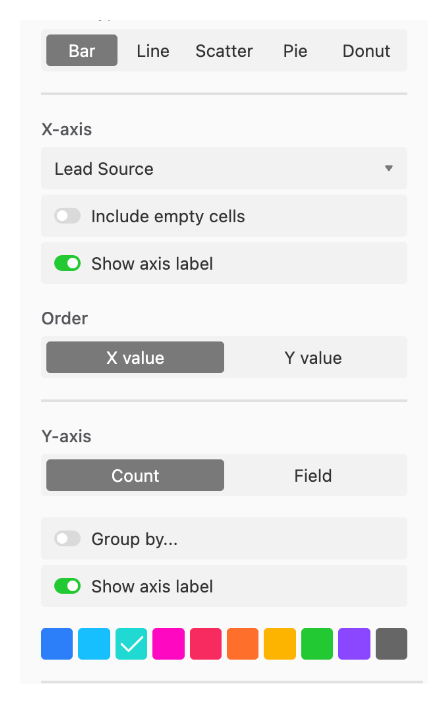
For other chart types like pie charts, the colors come from the underlying single-select field options. If you want to change how a category looks, you need to go back to the single-select field, click on the relevant option, and update its color there. The chart will reflect the change automatically.
7. Color Tabs and Bases
Beyond individual cells and records, Airtable lets you assign a color to each base, which makes it easier to navigate your workspace when you're managing several bases at once.
To change a base color, go to your Airtable home screen and click the three-dot menu on the base card. Select "Customize appearance" and you'll find separate tabs for color and icon. The color you pick shows up on the base card in your workspace, making it faster to spot at a glance.
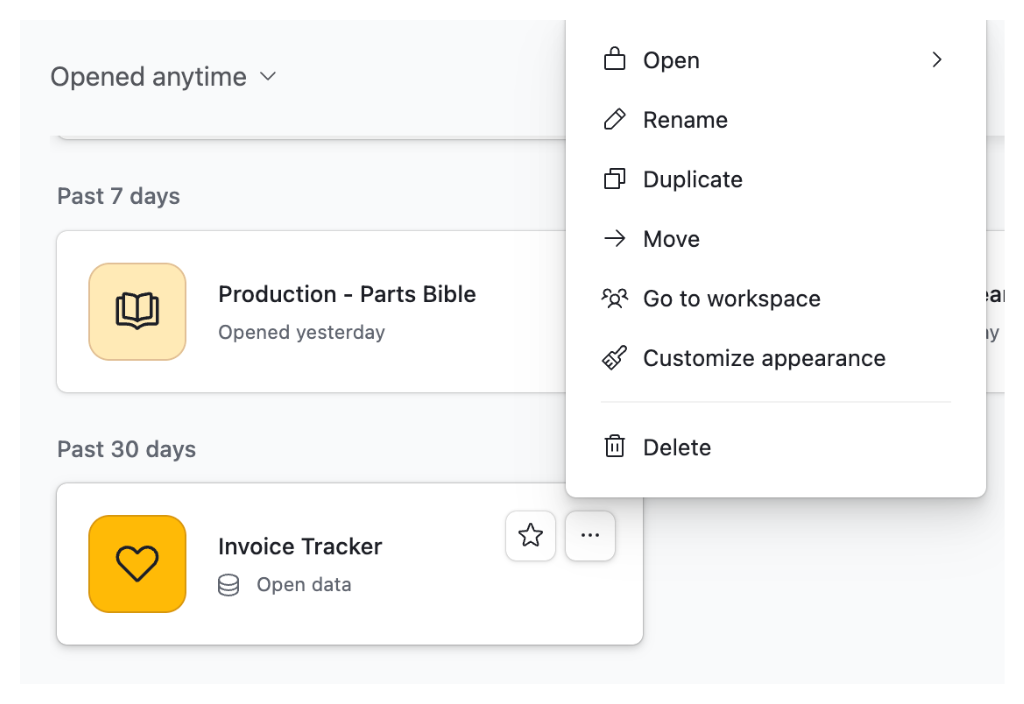
Note that individual table tabs inside a base cannot be colored. That option doesn't exist in Airtable currently.
Airtable Color Hex Values Reference
Airtable uses a fixed palette for single-select options, record coloring, and base icons. Each color comes in four shades: lightest, light, base, and dark. Here's the full reference:
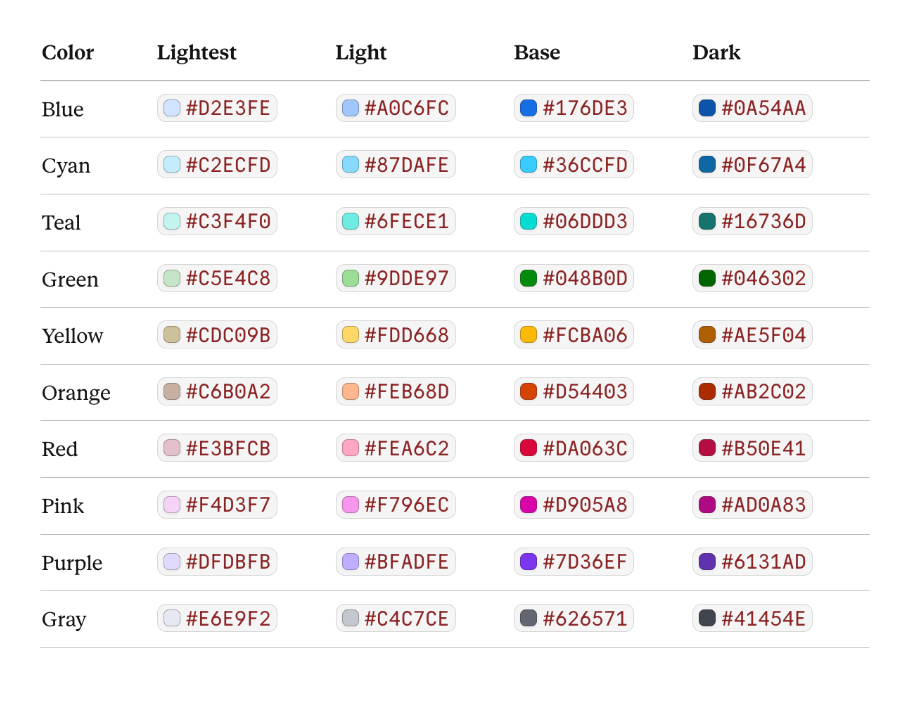
These are useful when you're trying to match your Airtable color coding to external tools, reports, or brand guidelines. Note that Airtable may update its palette over time, so if you notice any discrepancies, always defer to what you see in the app.
Depending on your data and workflow, you can mix and match these approaches. Single-select fields and record coloring cover most everyday use cases natively. For anything more granular, like individual cells, custom hex colors, or Excel-like highlighting, the Cell Coloring extension is your best bet.
If you want to take your visual organisation further, record coloring works well alongside views. For more on how views can be used to filter and focus your data for different team members, see How to Restrict User Access by Table, Field, or Row in Airtable.
For visualising aggregated data as charts rather than per-record colour coding, see How to Create Charts and Graphs in Airtable.